What Is a Trezor Hardware Wallet?
A Trezor hardware wallet is a physical device that provides an offline solution for storing and managing your cryptocurrency. Unlike software wallets, which store your private keys online, Trezor stores them offline in a secure environment. This makes it highly resistant to hacking attempts, malware, and phishing attacks.
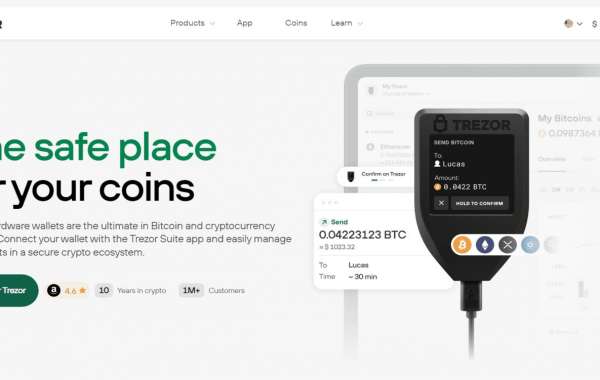
The wallet supports a wide array of cryptocurrencies, including Bitcoin (BTC), Ethereum (ETH), Litecoin (LTC), and many ERC-20 tokens. Users can manage their assets with Trezor Suite, the official application that offers seamless interaction with the wallet. As your gateway to the crypto world, Trezor.io/start is your entry point for setting up your Trezor hardware wallet and getting started securely.
Step-by-Step Guide to Setting Up Your Trezor Wallet
1. Accessing Trezor.io/start
The first step in setting up your Trezor wallet is to navigate to Trezor.io/start. This is the official page where you can download the Trezor Suite software and follow a series of simple steps to set up your wallet.
Make sure you are using the official website to avoid phishing scams. Using an official source guarantees that your wallet remains secure during the installation process.
2. Unboxing and Connecting Your Trezor
Upon unboxing your Trezor device, you will find the hardware wallet, a USB cable, recovery seed cards, and instructions. Connect the wallet to your computer using the provided USB cable, and open the Trezor Suite on your computer.
Once connected, the Trezor screen will display a prompt to begin the setup. Follow the on-screen instructions and install the necessary updates if required.
3. Setting Up a PIN
One of the first security measures you'll implement is setting up a PIN code. The PIN is essential for protecting your wallet from unauthorized access. You'll be asked to confirm your PIN on the device, adding an extra layer of security. Always use a strong PIN and never share it with anyone.
4. Generating Your Recovery Seed
After setting up the PIN, your device will generate a recovery seed, a sequence of 12, 18, or 24 words that act as a backup for your wallet. This recovery seed is the only way to restore your wallet in case it’s lost or damaged. Write down the recovery seed on the provided cards and store them in a secure location.
Remember, anyone with access to this seed can control your wallet, so do not share it or store it online.
5. Installing Firmware and Initializing the Device
The firmware is the heart of your Trezor hardware wallet. When setting up your wallet for the first time, it’s important to install the latest firmware to ensure your device is fully updated with the latest security patches and features. Follow the instructions in Trezor Suite to initialize the device and complete the firmware installation.
Exploring Trezor Suite: Managing Your Crypto Assets
After setting up your wallet, the next step is to manage your cryptocurrencies through Trezor Suite, the official desktop and browser app. With this software, you can securely send, receive, and manage your assets, all while maintaining full control over your private keys.
1. Adding Cryptocurrency Accounts
Once your Trezor is set up, you can start adding cryptocurrency accounts within Trezor Suite. This process allows you to manage multiple coins in one place, such as Bitcoin, Ethereum, and other supported assets. Navigate to the “Accounts” section and click on “Add Account” to select the desired cryptocurrency.
2. Sending and Receiving Crypto
Sending and receiving cryptocurrency with your Trezor wallet is straightforward. To send funds, simply navigate to the Send tab, input the recipient’s address, the amount to send, and confirm the transaction on your Trezor device. To receive cryptocurrency, go to the Receive tab, copy your wallet address, and share it with the sender. All transactions are confirmed directly on your hardware wallet, ensuring that your private keys remain secure.
3. Monitoring Transaction History
With Trezor Suite, you can easily track all your transactions, providing a detailed history of your crypto activities. This makes it easier to keep track of sent, received, and pending transactions.
Advanced Security Features
1. Passphrase Protection
For those seeking an additional layer of protection, Trezor offers the option to set up a passphrase. The passphrase functions as an additional word to your recovery seed, making it even more difficult for unauthorized users to access your wallet. Even if someone obtains your recovery seed, they won’t be able to access your funds without the passphrase.
2. FIDO2 Authentication
Trezor can also be used as a FIDO2 authentication device. This feature allows you to use your Trezor to securely log into online services and platforms that support FIDO2, adding a physical layer of security to your online accounts.
Why Choose Trezor Over Other Wallets?
1. Unmatched Security
Trezor’s primary advantage is its security. Unlike software wallets, which are susceptible to malware and phishing attacks, Trezor’s offline environment ensures that your private keys never touch the internet. This makes it virtually impossible for hackers to steal your funds.
2. Open-Source Technology
Trezor’s open-source nature is another major advantage. By making its code available to the public, Trezor allows independent developers to review, audit, and improve the security of its software. This transparency builds trust and enables continuous improvement.
3. Simple User Interface
Despite offering advanced security features, Trezor remains user-friendly, making it an excellent choice for both beginners and experienced cryptocurrency users. The intuitive interface of Trezor Suite ensures that anyone can manage their crypto assets with ease.
Keeping Your Trezor Safe: Best Practices
While Trezor provides cutting-edge security, it’s important to follow best practices to ensure that your wallet remains safe from threats:
- Never share your recovery seed: Keep your recovery seed in a secure location, and never share it with anyone.
- Update your firmware regularly: Regularly updating your Trezor firmware ensures you have the latest security features and bug fixes.
- Be cautious of phishing attacks: Always ensure you are accessing official websites, such as Trezor.io/start, and avoid clicking on suspicious links.
Conclusion: Your Path to Crypto Security with Trezor
The Trezor hardware wallet offers a perfect blend of security, usability, and flexibility for cryptocurrency users. By following the setup instructions from Trezor.io/start and taking advantage of the Trezor Suite application, you can securely manage your crypto assets without worrying about cyber threats.